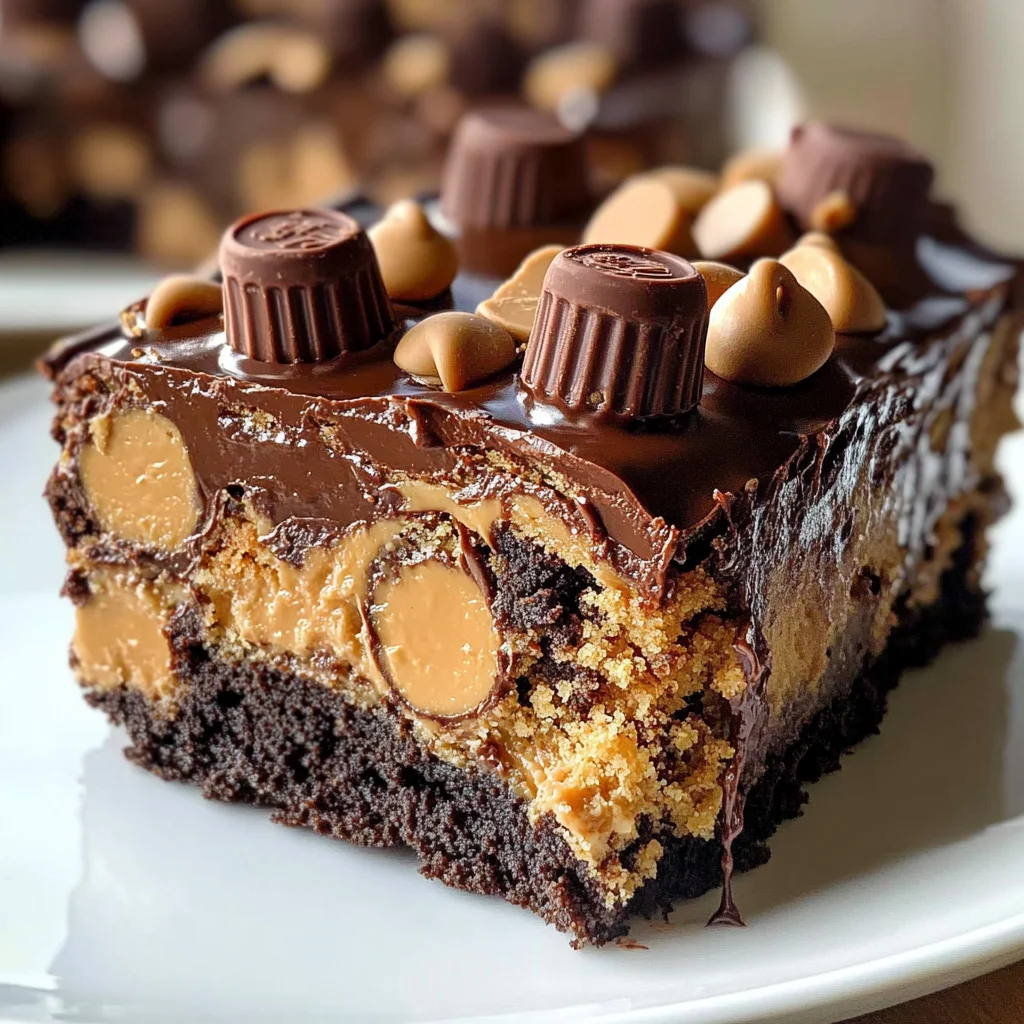
1 bowl peanut butter cup dump cake delight devours time
If you’re looking for a dessert that’s as easy to whip up as it is delicious, you’ve found it! The 1 bowl peanut butter cup dump cake delight devours time with its rich chocolate flavor and creamy peanut butter goodness. This cake is a true crowd-pleaser and perfect for any occasion—whether it’s a busy weeknight craving or a family gathering where you want to impress without spending hours in the kitchen. I always keep the ingredients on hand because you never know when the urge for something sweet will strike!
What makes this dump cake so special is its simplicity. Just mix, dump, and bake! You’ll be amazed at how quickly this dessert comes together, and trust me, your loved ones will be asking for seconds (and thirds)!
Why You’ll Love This Recipe
- Quick and easy: With just one bowl needed, clean-up is a breeze!
- Family favorite: Kids and adults alike adore the combination of chocolate and peanut butter.
- Perfect for any occasion: Whether it’s a potluck or a quiet night at home, this dessert fits right in.
- Make ahead: You can prepare this cake in advance, making life easier on busy days.
- Decadent flavor: Rich chocolate cake paired with gooey peanut butter makes every bite irresistible!
Ingredients You’ll Need
Let’s talk about the ingredients! They’re simple, wholesome, and easy to find. This recipe uses pantry staples that you probably already have on hand. Here’s what you’ll need to create this delightful treat:
For the Cake
- 1 box chocolate cake mix
- 1 cup peanut butter
- 1/2 cup melted butter
- 1 1/2 cups milk
For Toppings
- 1 cup mini peanut butter cups
- 1/2 cup chocolate chips
Variations
This recipe is wonderfully flexible! Feel free to make it your own with these fun variations:
- Add some crunch: Toss in some chopped nuts for added texture.
- Switch up the chocolate: Use dark chocolate cake mix for a richer flavor.
- Make it festive: Top with seasonal sprinkles or colored candies for special occasions.
- Go gluten-free: Substitute the regular cake mix with a gluten-free version to accommodate dietary needs.
How to Make 1 bowl peanut butter cup dump cake delight devours time
Step 1: Preheat Your Oven
First things first—preheat your oven to 350°F (175°C). This ensures that your cake bakes evenly and rises beautifully while you prepare the rest of the ingredients.
Step 2: Prepare Your Baking Dish
Next, grab a 9×13-inch baking dish and grease it well. This step is crucial; it helps prevent the cake from sticking and makes serving much easier later on.
Step 3: Spread Peanut Butter
Now, take that creamy goodness of peanut butter and spread it evenly over the bottom of your prepared dish. This layer adds a deliciously gooey base that complements the cake perfectly.
Step 4: Mix the Batter
In a large bowl, combine your chocolate cake mix, melted butter, and milk. Stir until smooth—this should only take a minute or two. Mixing thoroughly ensures that your dump cake has an even texture throughout.
Step 5: Pour Over Peanut Butter Layer
Carefully pour the batter over your peanut butter layer. Don’t worry about making it perfect; remember, this is a “dump” cake! The layers will meld together as they bake.
Step 6: Add Toppings
Sprinkle those mini peanut butter cups and chocolate chips generously on top of the batter. This will create an irresistibly sweet topping that melts into the cake as it bakes.
Step 7: Bake
Place your baking dish in the preheated oven and bake for 35-40 minutes. Check for doneness by inserting a toothpick into the center—it should come out clean when ready.
Step 8: Let Cool Before Serving
Once baked to perfection, allow your dump cake to cool slightly before serving. This gives everything time to set up nicely—and trust me, patience pays off when enjoying this dreamy dessert!
Now you’re all set to indulge in this delightful treat! Enjoy every bite of your warm slice of heaven!
Pro Tips for Making 1 bowl peanut butter cup dump cake delight devours time
Making a delicious dump cake is all about keeping it simple and ensuring that every bite is as delightful as the last! Here are some pro tips to help you achieve the best results:
-
Use room temperature ingredients: Allowing your butter and milk to come to room temperature helps create a smoother batter, resulting in a more evenly baked cake.
-
Don’t overmix the batter: Mixing just until combined keeps your cake light and fluffy. Overmixing can lead to a denser texture, which isn’t what we want in this delight!
-
Experiment with toppings: Feel free to add nuts, such as chopped peanuts or walnuts, on top for an extra crunch. This adds texture and enhances the flavor profile of your dessert.
-
Serve warm for maximum enjoyment: Serving the dump cake warm allows the peanut butter and chocolate flavors to shine through beautifully. You can even add a scoop of non-dairy ice cream for an indulgent treat!
-
Store properly: If you have leftovers (which is rare!), store them in an airtight container at room temperature. This cake stays delicious for several days and makes for a great snack!
How to Serve 1 bowl peanut butter cup dump cake delight devours time
Presenting your peanut butter cup dump cake beautifully will make it even more enticing! Here are some ideas on how to serve this scrumptious dessert:
Garnishes
-
Whipped coconut cream: A dollop of whipped coconut cream on top adds a creamy texture that complements the rich flavors of peanut butter and chocolate.
-
Chocolate drizzle: Drizzling melted dairy-free chocolate over the top not only looks stunning but also enhances that chocolaty goodness.
Side Dishes
-
Fresh fruit salad: A mix of seasonal fruits like berries, bananas, and apples provides a refreshing contrast to the richness of the cake. The natural sweetness balances out the flavors perfectly.
-
Vegan ice cream: Serve alongside your favorite dairy-free ice cream for a decadent dessert experience. The cold creaminess pairs wonderfully with the warm dump cake.
-
Chocolate syrup: Offering chocolate syrup on the side allows guests to customize their servings with extra chocolatey goodness if they desire.
With these serving suggestions in mind, you’ll be ready to impress family and friends with your delightful creation! Enjoy every moment as you dig into this delicious treat!
Make Ahead and Storage
This peanut butter cup dump cake is perfect for meal prep, allowing you to enjoy a delicious dessert any day of the week without the fuss. You can easily store leftovers or even freeze portions for later enjoyment.
Storing Leftovers
- Store any leftover dump cake in an airtight container.
- Keep it at room temperature for up to 2 days.
- For longer storage, refrigerate it for up to a week.
Freezing
- Allow the cake to cool completely before freezing.
- Cut into individual portions for easier thawing.
- Wrap each piece tightly in plastic wrap and place them in a freezer-safe bag. It will last for up to 3 months.
Reheating
- To reheat, remove the desired portion from the freezer and let it thaw in the refrigerator overnight.
- Warm in the microwave for 20-30 seconds or until heated through.
- Enjoy with a scoop of your favorite non-dairy ice cream if desired!
FAQs
Here are some common questions about this delightful recipe:
Can I make this 1 bowl peanut butter cup dump cake delight devours time gluten-free?
Yes! Simply substitute the chocolate cake mix with a gluten-free version, and you’ll have a delicious gluten-free dessert that everyone can enjoy.
How do I know when my peanut butter cup dump cake is done baking?
The cake is ready when a toothpick inserted into the center comes out clean. Keep an eye on it during the last few minutes of baking!
Can I use other types of chocolate chips in this dump cake?
Absolutely! Feel free to experiment with dark chocolate or dairy-free chocolate chips to suit your taste preferences.
What makes this recipe special?
The combination of rich chocolate and creamy peanut butter creates a uniquely satisfying dessert that’s both comforting and indulgent.
Final Thoughts
I hope you find joy in making this one-bowl peanut butter cup dump cake that devours time just like I do! It’s not only simple but also incredibly rewarding to share with family and friends. Whether it’s for a special occasion or just because, I’m sure you’ll love every bite. Happy baking, and don’t forget to share your experience!
1 Bowl Peanut Butter Cup Dump Cake Delight
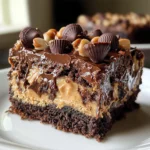
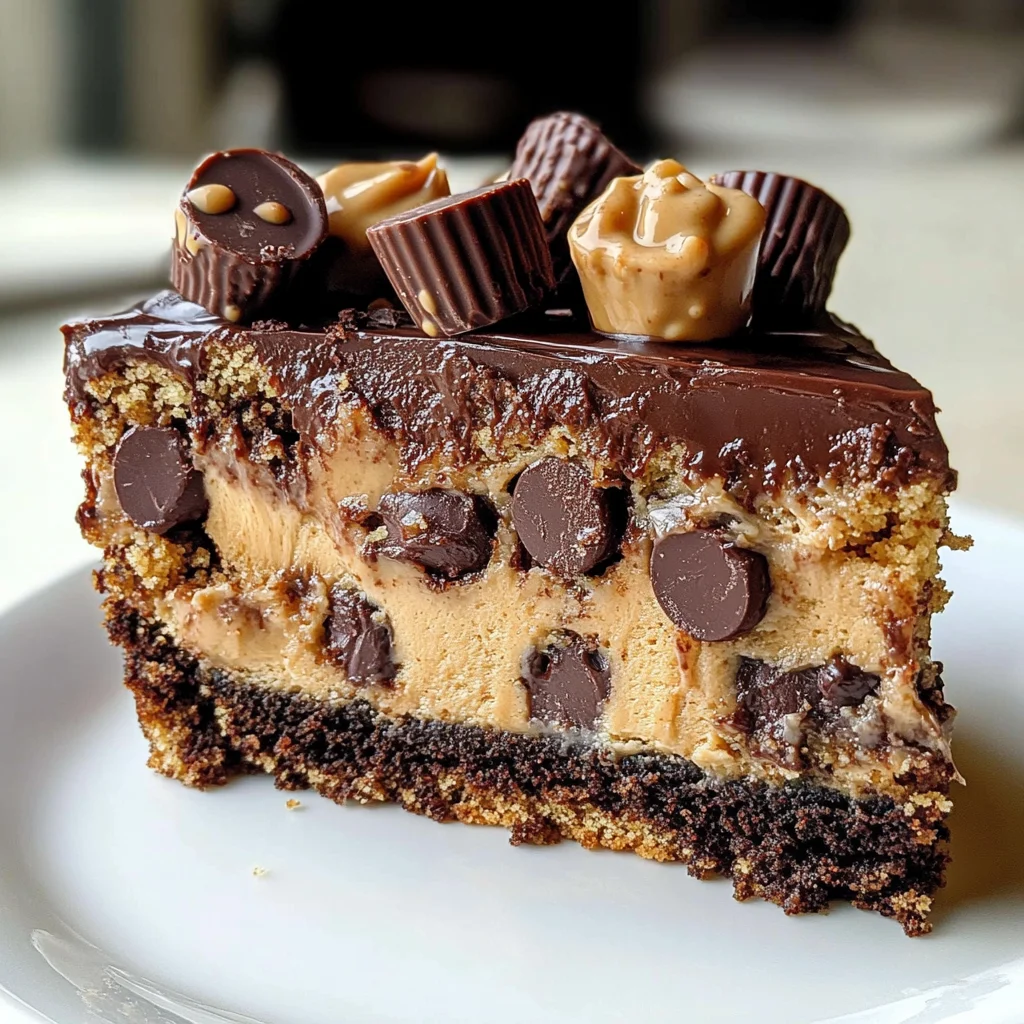
Indulge in the delightful simplicity of the 1 bowl peanut butter cup dump cake, a dessert that combines rich chocolate flavor with creamy peanut butter goodness. This easy-to-make treat is perfect for any occasion, whether it’s a family gathering or a quiet evening at home. With just one bowl required for preparation, clean-up is minimal, making it an ideal choice for busy days when you crave something sweet. The cake bakes beautifully, creating a gooey layer of peanut butter underneath a rich chocolate topping studded with mini peanut butter cups and chocolate chips. Your loved ones will be asking for seconds of this crowd-pleaser!
- Prep Time: 15 minutes
- Cook Time: 40 minutes
- Total Time: 55 minutes
- Yield: Serves approximately 12 servings 1x
- Category: Dessert
- Method: Baking
- Cuisine: American
Ingredients
- 1 box chocolate cake mix
- 1 cup peanut butter
- 1/2 cup melted butter
- 1 1/2 cups milk
- 1 cup mini peanut butter cups
- 1/2 cup chocolate chips
Instructions
- Preheat the oven to 350°F (175°C) and grease a 9×13-inch baking dish.
- Spread peanut butter evenly over the bottom of the prepared dish.
- In a large bowl, mix together cake mix, melted butter, and milk until smooth.
- Pour the batter over the peanut butter layer.
- Top with mini peanut butter cups and chocolate chips.
- Bake for 35-40 minutes or until a toothpick inserted into the center comes out clean.
- Allow to cool slightly before serving.
Nutrition
- Serving Size: 1 slice (100g)
- Calories: 370
- Sugar: 28g
- Sodium: 320mg
- Fat: 22g
- Saturated Fat: 10g
- Unsaturated Fat: 10g
- Trans Fat: 0g
- Carbohydrates: 36g
- Fiber: 2g
- Protein: 6g
- Cholesterol: 30mg